Ransomware is a form of malware used to extort money from unwitting PC users, and makes up one of the most serious computer tech support issues prevalent these days. The malicious attacker encrypts your files, and then holds them to ransom, demanding you pay what they ask in exchange for the decryption key. WannaCry is […]
The post How to Remove WannaCry from your System appeared first on Online Technical Support.
]]>
Ransomware is a form of malware used to extort money from unwitting PC users, and makes up one of the most serious computer tech support issues prevalent these days. The malicious attacker encrypts your files, and then holds them to ransom, demanding you pay what they ask in exchange for the decryption key. WannaCry is one of the more notorious ransomware out there. If you ever face this computer tech support issue, following are some ways to proceed.
Manual Ransomware Removal
- Restart the computer in Safe Mode. For this, hit the reboot button and while the machine starts up, hit F8 Choose Safe Mode.
- Get rid of any suspicious programs from the startup. First, hold Windows and R. In the field that appears, type msconfig.
- Fake or infected items listed here will have Unknown as the manufacturer. Find and remove these entries. Hit OK when done.
- Hold Windows and R. Type in %temp% and hit OK. A folder will pop up, showing all the temporary files in your system. Select them all using CTRL + A and then hit Shift + Delete.
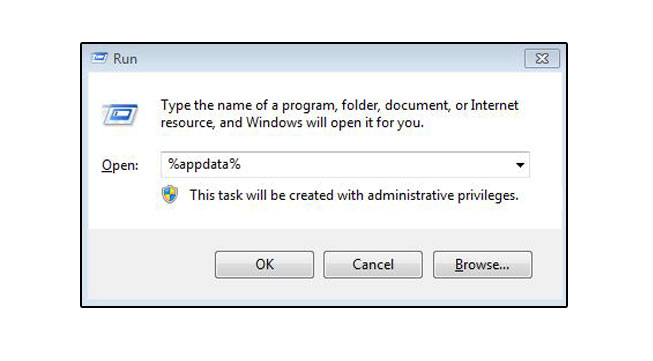
- Remove virus infected files. Hold Windows and R, and type %appdata% into the field and hit OK. Find and delete recent files associated with the WannaCry ransomware.
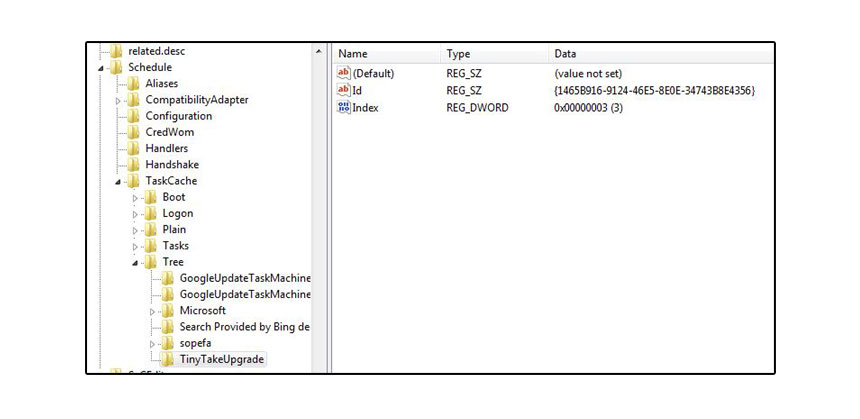
- Clear the registry entries. Hold Windows and R and type in regedit. Go to HKEY_LOCAL_MACHINE\SOFTWARE\Microsoft\WindowsNT\CurrentVersion\Schedule\TaskCache\Tasks\{41D55966-1192-454F-9C86-D0EB950D9984. If you find keys associated with Sage, right click and delete them. Repeat this in HKEY_LOCAL_MACHINE\SOFTWARE\Microsoft\Windows NT\CurrentVersion\Schedule\TaskCache\Tree\Fd3KZfCq.
Automatic Ransomware Removal
It is risky at best to make changes to your registry yourself. A malware removal tool is almost always safer, preventing many computer tech support issues. Plumbytes Anti-Malware is good at what it does, so we will go with that.
- Download the setup, and install the program by opening the file and following the on-screen prompts after you hit the Install
- After the installation finishes, the program will do an update of its database and then run a new scan. The results will start showing as and when they are found, and you will get a fair idea of the trouble you’re facing even before the scan completes.
- After this, you will see a comprehensive list of the threats detected, with all of them marked for deletion. Hit REMOVE NOW. Alternatively, if you spot any safe programs in the list which you don’t want to remove, then deselect these before hitting REMOVE SELECTED.
- After the programs have been deleted, restart the PC to ensure the changes take effect.
The post How to Remove WannaCry from your System appeared first on Online Technical Support.
]]>If you are wondering how or why the computer is running slow, the existence of a Trojan horse virus in the PC may be to blame. Trojan is a malware program, which infects programs and files in the system while downloading other files from the web or while opening an email attachment that contains the […]
The post How to Remove Trojan Virus from a Windows Computer appeared first on Online Technical Support.
]]>
If you are wondering how or why the computer is running slow, the existence of a Trojan horse virus in the PC may be to blame. Trojan is a malware program, which infects programs and files in the system while downloading other files from the web or while opening an email attachment that contains the said virus.
It stays hidden in harmless programs installed in the PC, and it may occur to you to remove the Trojan virus only after slowness of the system come to your notice. Follow the below steps for Trojan horse removal from a Windows PC. By removing it, you can make the PC run productively as it should be.
Trojan viruses may infect System Restore points, which you may have previously set in Windows. If you disable a System Restore though, you can ensure the said virus will not infect the feature by any means. For that, open System Properties by right-clicking Computer in Start button and choosing Properties. Then, click on System protection to the left side of the window that pops up and select Configure option.
After that, click on Turn off system protection and use the Delete button to remove all the System Restore points that are saved on Windows PC. After removing Trojan horse from the PC, you can enable the feature.

To proceed with Trojan virus removal, install a reliable antivirus software in your Windows PC. There are several paid as well as free antivirus programs available, which would help you do that; so choose one as per your requirements. After the installation, restart the computer in Safe Mode with Networking by pressing F8 on the keyboard and choosing the respective option from the Advanced Boot menu.
By booting Windows in the said mode, you can download files over the web while removing the Trojan virus. Once in Safe Mode, open Control Panel and choose Add/Remove Programs to uninstall any program that Trojans may have installed without your permission. When done, run a full computer scan with the antivirus software. Wait until the completion of the virus scan, and if the antivirus software detects Trojan horse, remove the virus immediately.
It would take a few minutes to up to an hour or more, depending upon the number of programs and files in the system. However, if the antivirus does not detect Trojan, you can get in touch with computer support professionals for more tips on how to remove Trojan horse from Windows PC.
The post How to Remove Trojan Virus from a Windows Computer appeared first on Online Technical Support.
]]>When the computer boots up, it loads the operating system and certain hard drive settings in order to make it user ready. The startup time of a system may slow down due to several factors, including the performance of RAM. Below are the top four ways to boost the booting speed of a Mac PC […]
The post How to Make a Mac PC to Boot Up Quickly appeared first on Online Technical Support.
]]>
When the computer boots up, it loads the operating system and certain hard drive settings in order to make it user ready. The startup time of a system may slow down due to several factors, including the performance of RAM. Below are the top four ways to boost the booting speed of a Mac PC featuring OS X Lion or a later version.
Quit Applications While Turning Off
In case you keep more apps open when shutting down a Mac PC, it will resume the open windows and apps when the system starts. This would make the PC to boot up slow. Henceforth, you should quit applications prior to shutting down or at least deselect the Reopen Windows When Logging Back In option when you get prompted to confirm system shut down. If you disable that, OS X would open applications upon start, but not each window you may have left open.
Install a Solid State Drive in the PC
Usually, if the free space is more on a computer’s hard disk it will run fast. The more the hard disk space the easier it will be for OS X to boot up. In case you install an SSD in the PC, it will enhance required boot time by speeding up app loading on the startup screen of Mac PC.
Clean Up the Desktop Icons

Users have a tendency to create plenty of shortcuts of files on the desktop of computers, but it will affect the boot up time. The computer should load each desktop icon while it boots up, so it is best to clear the clutter on the desktop by moving shortcuts of files to elsewhere in the PC.
Hide Apps That Load Up upon Start
To hide unused applications, which you do not want OS X to load automatically when you log in to Mac PC including extensions, click the Apple menu, navigate to System Preferences, and select Users and Groups from the context menu that pops up. From the list of what Apple calls Login Items that will open when OS X boots up, deselect a checkbox next to a helper application in the list. There might be a browser add-on, which you may not need to load upon starting the system, so hiding that will enhance the booting time of Mac PC.
The post How to Make a Mac PC to Boot Up Quickly appeared first on Online Technical Support.
]]>Microsoft Windows Update Checker, or updatechecker.exe, is a Trojan horse element that uses CPU resources to mine digital currency. Malwarebytes is a powerful scanner, which can remove this threat from your PC before it crashes. Removing updatechecker.exe Download and start installing the Malwarebytes from online. When User Account Control asks you if you want to […]
The post How to Reset your Browser after Removing updatechecker.exe appeared first on Online Technical Support.
]]>
Microsoft Windows Update Checker, or updatechecker.exe, is a Trojan horse element that uses CPU resources to mine digital currency. Malwarebytes is a powerful scanner, which can remove this threat from your PC before it crashes.
Removing updatechecker.exe
- Download and start installing the Malwarebytes from online.
- When User Account Control asks you if you want to allow the program to make changes, choose Yes.
- The setup wizard will guide you with prompts for completing the installation process. Keep hitting Next.
- After installation is complete, the program will start running and first of all, update the antivirus database. To begin a scan, you can hit Scan Now.
- Your computer will now be scanned for malicious programs. This can take some time, so it is good to move on to some other work until it is done.
- After the scan has finished, you will be shown a screen where the detected malware infections will be displayed. You can remove said infections by choosing the Quarantine Selected
- After that, all malicious files and registry keys will be quarantined by the program. In order to complete removing all of these, you may need to restart your computer.
- After the removal is done, close the program.

After you have removed updatechecker.exe with a virus removal tool, the next order of business is to make sure that your browser is reverted to default settings. This is mainly to ensure that similar infections do not find their way in through the internet.
Resetting Google Chrome
There is an option in Google Chrome where the browser will reset itself to default settings. The option is in place so that you can counteract any apps or extensions making changes to your settings without your knowledge. Doing this will not change your saved bookmarks or remove the passwords.
- Open Google Chrome on the computer.
- Go to the top right and select More, and then choose Settings.
- Go to the bottom and choose Show Advanced Settings.
- Under the Reset Settings section, choose the Reset Settings
- A box will come up. Choose Reset.
Make sure that you have the latest version of Chrome installed, so that it is easier to keep reverting to default settings each time you remove a threat from the computer. Also, make sure to update the virus definitions on the antimalware program, so that it can deal with new and emergent threats.
The post How to Reset your Browser after Removing updatechecker.exe appeared first on Online Technical Support.
]]>Most Mac users have the misplaced conviction that comes with owning an Apple product name, that their device cannot get infected with viruses. This isn’t true in the least bit – there are plenty of malware out there attacking Macs. Although it is true that these are fewer than the ones targeting Windows PCs and […]
The post Removing Malware from a Mac appeared first on Online Technical Support.
]]>
Most Mac users have the misplaced conviction that comes with owning an Apple product name, that their device cannot get infected with viruses. This isn’t true in the least bit – there are plenty of malware out there attacking Macs. Although it is true that these are fewer than the ones targeting Windows PCs and laptops, it does not mean your device is always in the clear.
Some of the well-known malware that manage to infect Mac PCs are:
- MacDefender
- MacProtector
- MacSecurity
These names, while giving the impression that they are antivirus products, actually hide the malicious nature of the programs. At best, they fool Apple users into giving up their credit card or Apple ID information.
Two of the main dangers Apple users might face are false alert messages and previously installed malware. If there is any message coming up that says, “A problem has been detected with your Mac”, then it probably has to do with getting you to unintentionally download malware.
- If you see the message, ignore it. If you have gone ahead and downloaded something from the site, then quit the browser you were using, navigate to the Downloads folder, and drag the new items into the Trash. After that, empty the Trash. Do not ever visit that website again, because there is a good chance that it has been hacked.
-

False Alert Messages If you think the malware has already been installed on the system, and there are signs of this such as pop ups asking for your Apple ID or credit card details, close the app you think might be infected. Fire up the Activity Monitor and find the relevant app.
- After you identify the malware, hit Quit Process and close the Activity Monitor. Go to the Applications folder, drag and drop the unwanted software in the Trash, and then empty the Trash.
- Ensure that all of your software and apps are updated, and that you have downloaded the latest bug fixes directly from Apple.
In much the same way as with a PC, it is beneficial in the long run to add some protection to your computer. You can get software designed for the protection of Mac systems, which can clean up your files, remove viruses and other malware, and safeguard your online privacy. The antivirus would need to be periodically updated for this to happen effectively. If you already have a computer virus removal tool, make sure that it is updated to the latest standards.
The post Removing Malware from a Mac appeared first on Online Technical Support.
]]>There are times when one encounters a ‘stop error’ while using a Windows 10 PC. The error may appear on the screen when updating Windows to a latest version or when you connect an incompatible hardware to your computer. The error is known as ‘Blue Screen of Death’ since the screen is filled with a […]
The post How to Troubleshoot Stop Error in Windows 10 PC appeared first on Online Technical Support.
]]>
There are times when one encounters a ‘stop error’ while using a Windows 10 PC. The error may appear on the screen when updating Windows to a latest version or when you connect an incompatible hardware to your computer. The error is known as ‘Blue Screen of Death’ since the screen is filled with a blue backdrop with a prompt to restart the PC. Thankfully, you can clear the stop error with the below troubleshooting steps each time the error occurs in Windows 10 PC.
When Updating Windows
This may happen if you install third-party virus removal software or hardware, which is not compatible with Windows 10. If the blue screen error occurs when you update the OS, it would restore into previous version thereby reverting the changes. To troubleshoot the error, uninstall the third-party app and start the process again.

If you installed third-party antivirus recently in Windows 10 PC, try to uninstall the same in order to troubleshoot. For that, navigate to Settings > System > Apps & Features, choose the application, and click on Uninstall. Follow the on-screen prompts for completing the process. Repeat the same for removing any software that you suspect have caused the ‘Stop’ error in Windows 10. Once you upgrade the OS, you can choose to install the app again and they would work as expected.
As the error may also happen if a hardware device is not compatible with Windows 10, if it is broken, or if the OS tries to install a wrong driver for your PC, you need to check that too. If you are connecting an old hardware into the computer, your OS may not be able to read it. You can go through the user manual of the hardware in order to configure whether it is compatible with Windows 10. If not compatible, you need to connect a compatible one. Besides that, you should also download the latest driver of the hardware from the manufacturer website.
Troubleshooting with Safe Mode
If you cannot access the desktop even after performing the aforementioned steps, enter the Safe Mode to troubleshoot the blue screen error on Windows 10. Wait for the PC fail to start a minimum 3 times so that a repair screen appears automatically, and you see Choose an Option. Opt for Troubleshoot, and then navigate to Advanced Options > Startup Settings > Restart. Hold the F4 button on the keyboard once the system restarts to enable Safe Mode and then you can uninstall the faulty apps or update device drivers accordingly.
The post How to Troubleshoot Stop Error in Windows 10 PC appeared first on Online Technical Support.
]]>As a crucial component of your computer, the Random Access Memory or RAM is responsible for storing data temporarily. This temporary or cached data is important and aids in the functioning of the computer. Although the temporary data stored in the RAM and CPU cache are erased when you shut down your computer, any issues […]
The post Important Warning Signs of a Faulty RAM on your Computer appeared first on Online Technical Support.
]]>
As a crucial component of your computer, the Random Access Memory or RAM is responsible for storing data temporarily. This temporary or cached data is important and aids in the functioning of the computer. Although the temporary data stored in the RAM and CPU cache are erased when you shut down your computer, any issues with the RAM can cause your computer to malfunction.
The failure rate of RAM is low when compared to other components since it has no moving parts. However, this does not mean that your computer’s memory is free from any issues. These issues might often go unnoticed and can cause your computer to fail at some point. A faulty RAM in your computer often exhibits a range of symptoms that you can refer to for diagnosing the problem. Below are some of the important warning signs of a faulty RAM on your computer
Drop in System Performance
A faulty RAM is usually indicated by a rapid drop in the performance of your computer. If you find that your computer is functioning normally during startup, but slowly starts lagging in performance, it could be the result of a faulty RAM. This is especially evident if you run any graphics-rich applications like games or use web browsers and high-end software.
Irregular Crashes
If your computer is experiencing any crashes on an irregular basis, then the culprit is likely to be the RAM. Mostly, regular crashes such as those that come with a blue screen of death could signal a software problem. However, occasional crashes without any kind of warnings are usually attributed to a faulty RAM.
Presence of Corrupted Files

If you find that many of the files that you regularly use are corrected and incapable of executing, then it is a major warning sign of a faulty RAM. This is usually displayed in the form of error messages when you try to open the file. You can be sure that the RAM is the cause of the issue if many other files also end up corrected and unable to open.
GPU Loading Failure
The Graphics Processing Unit (GPU) can fail to load if your computer has a faulty RAM. Normally during startup, your computer will send a beep sound indicating that the video hardware is recognized and properly booted. If you found that no beep sounds are produced, it means that the GPU unit is not loaded during booting.
Installed RAM Displayed Incorrectly
Another warning sign to look for a faulty RAM in your computer is to look in the basic information of your computer. This can be accessed by navigating to the Control Panel and selecting the System option. You can see the installed memory (RAM) displayed, which will be incorrect when compared to its actual capacity for a faulty RAM.
The post Important Warning Signs of a Faulty RAM on your Computer appeared first on Online Technical Support.
]]>Issues with speeds and performance are mostly attributed to the presence of several unnecessary and junk files accumulated on the hard drives. These files can hinder the speed and performance of the system, thus making it difficult for you in performing even basic tasks with your computer. Therefore, it is essential that these files need […]
The post Why you Should Use the Disk Cleanup Tool in your Computer appeared first on Online Technical Support.
]]>Issues with speeds and performance are mostly attributed to the presence of several unnecessary and junk files accumulated on the hard drives. These files can hinder the speed and performance of the system, thus making it difficult for you in performing even basic tasks with your computer. Therefore, it is essential that these files need regular clean up and organizing to restore your computer to its optimum working condition.
Windows has its own built-in system utility too known as Disk Cleanup, which you can use to remove many such unwanted and temporary files from your computer. This tool searches for temporary files, log files, internet history, error reports, installation files, and offline saved contents that are taking up valuable memory on your drives. The following are some benefits of using the Disk Cleanup tool in your computer.
Recovers Disk Space

Using the Disk Cleanup tool can help recover valuable hard drive space on your computer. Over time, a computer will accumulate several files that can take up several megabytes of storage. In some cases, the computer writes memory dump files onto the hard drive due to a crash that can take up large amounts of space. The Disk Cleanup tool can identify many such temporary and junk files that are taking valuable space on your computer. You can then selectively remove these files for recovering the hard disk space on your computer.
Prevents Clogging of Hard Disk
One of the key reasons for a slowdown in system performance it due to a full hard disk. This clogging of data can prevent you from storing any more data while also negatively influencing the performance of the system. By running the Disk Cleanup tool, you can free up some available space on your hard drive that will allow the RAM to function without any overloads. This will enable the system to run and execute functions much faster without any crashes.
Enables File Compression
Disk Cleanup can remove any unnecessary files accumulated in your computer hard drives. It has an option to compress the files without deleting them, which is a helpful feature for saving old yet important system files in the least space as possible. File compression ensures that the space on your hard drives is increased without the need to delete these files.
The post Why you Should Use the Disk Cleanup Tool in your Computer appeared first on Online Technical Support.
]]>Most of the computer users often use USB flash drives, SD cards, or external hard disks to copy or transfer files and other data from one computer to another. Unfortunately, several computer users pay zero attention to the fact that transferring data from a virus-infected PC to other computers might make them also infected. This […]
The post How to Remove Shortcut Virus from a Laptop appeared first on Online Technical Support.
]]>
Most of the computer users often use USB flash drives, SD cards, or external hard disks to copy or transfer files and other data from one computer to another. Unfortunately, several computer users pay zero attention to the fact that transferring data from a virus-infected PC to other computers might make them also infected.
This is the major reason why you should install an anti-virus program on your computer and scan all the external storage devices before you open them from your PC. This will help you to prevent the chances of virus and malware infection on your computer.
If all the files in an external storage device that you have just connected to your computer are displayed as shortcuts, then you can confirm that a shortcut virus has infected your PC. Before you proceed to any other step, plug in another USB flash drive and check whether you are experiencing the same error.
If yes, you will need to immediately remove the shortcut virus from your computer in order to protect the files and data in the device. If you have no prior knowledge on how to remove shortcut virus from a laptop or PC, below are a few simple set of steps that will help you to accomplish it with ease.
Using Command Prompt for Shortcut Virus Removal
-

Using Command Prompt Start your PC and then go to Run, type CMD, and simply hit the Enter
- You will now need to type the attrib -h -s -r -a /s /d C:*.* command in the command prompt of your computer.
- If the shortcut virus that you wish to remove from your computer is on G drive, then replace the C from code with G, that is, attrib -h -s -r -a /s /d G:*.*
- Hit the Enter key on your keyboard, as it will automatically remove the entire dangerous and unwanted shortcut virus from your computer.
Now, run a full scan of your computer to ensure that your PC is free from virus and malware infections. If you detect any kind of issues, perform the necessary steps for shortcut virus removal. If you have no clear idea on how to remove shortcut virus from a PC, it is best to get in touch with a computer tech support team for help.
The post How to Remove Shortcut Virus from a Laptop appeared first on Online Technical Support.
]]>If your PC or laptop is running at a slower pace than the normal, and if you keep on receiving pop-up messages when you open your internet browser, then there might be a virus infection on your computer. It is not obvious that your computer is infected, but virus attack is usually the root cause […]
The post How to Remove Virus Infection from a Computer appeared first on Online Technical Support.
]]>
If your PC or laptop is running at a slower pace than the normal, and if you keep on receiving pop-up messages when you open your internet browser, then there might be a virus infection on your computer. It is not obvious that your computer is infected, but virus attack is usually the root cause of these issues.
It is seen that several users start to get a little bit worried when they realize that their computer has been infected with a malware or virus. However, there is no need to get frustrated or worried because computer virus removal can be done quite easily with the help of an antivirus software application. Unfortunately, many computer users have no clue on how to remove virus infection from a computer. If you are one among them, then below are a few simple steps that will help you to do so.
Enter Safe Mode
Turn off your desktop computer or laptop and then turn it on again. Make sure to press the F8 button on your keyboard as soon as you see anything on the screen of your computer. This will automatically bring up the Advanced Boot Options menu. Select Safe Mode with Networking option and then press Enter.
Delete Temporary Files
Once you have entered the Safe Mode, be sure to delete the Temporary Files on your computer with the help of the Disk Cleanup tool. For that,
- Go to the Start menu of your computer.
- Select All Programs followed by Accessories.
- Click on System Tools and then select Disk Cleanup.
- Scroll across the Files until you reach the Delete list, and then look for Temporary Files and delete it.

Deleting the temporary files will speed up the virus scanning and it might even remove the virus from your computer.
Run a Virus Scan
Let us assume that you have already downloaded and installed an antivirus software application for computer virus removal. If you haven’t done that yet, then do it before you proceed to the next step. When done, run the antivirus software on your computer and let it scan the system thoroughly. This will take a couple of minutes to an hour depending upon the files in your computer.
The antivirus will detect the threats in your PC and remove them upon your request. If your computer is still running slow or if you feel that the virus infection is not completely removed, get in touch with an expert computer technician for further assistance with computer virus removal.
The post How to Remove Virus Infection from a Computer appeared first on Online Technical Support.
]]>